Saturday, May 24, 2014

A Visit to Purushaland

At the end of March, 2014, I attended an 8-night WPA (World Peace Assembly) at the Maharishi Purusha Capital of the Western World, also known as the Global Capital of World Peace, and which I informally refer to as Purushaland. That's less of a mouthful.
This visit was in lieu of another trip to Fairfield, Iowa, and Maharishi International University and the Invincible America Assembly. I've been going to Fairfield once or twice a year for over a decade for intensive meditation getaways, and I've documented many these visits. I thought Purushaland, in West Virginia, would be an interesting change of scene, and it's four hours closer.

When you drive onto the property, the first thing you are presented with is the main dining hall. The lower block of residences are visible behind and above.
One of the residence buildings was used to house all but two of the nine course participants, and also provided a room for our extended group meditations. This is the one.
Here is your blogger in front of the building on the first day of the course.

I lucked out and got an upper corner room, very desirable. Here it is in panoramic view. The far doors lead to the bathroom and a closet.
The room was very comfortable, with lots of light. However, as one course participant noted, it was obviously designed by men: there is no light fixture next to the bathroom mirror.

The buildings are all of modular construction, custom designed for and by Purusha. Each accommodates 10 residents in single housing, plus two meditation rooms and a communal kitchenette.

Near the top of the hill is an upper block of 5 residential buildings.
From up here the already panoramic West Virginia view truly unfolds. 
Every building on this campus follows Sthapatya Vedic principles, including facing east and receiving morning sunlight within 12 minutes of dawn. However, I learned, the shadows of temporary objects such as trees and buildings don't count against the 12 minute limit. Only truly permanent obstacles, such as mountains, need be taken into account.

Most people go from place to place on campus by foot, but if needed electric carts are available.
Walking down the road from my residence building to the dining hall, I saw the following view.
Here is a panoramic view of the dining hall, complete with flags of the world.
The dining area uses only about one-third of the building; the remainder is kitchen, mail room, and Purusha meeting room.

Off to one side, a somewhat larger building is being finished. Having four additional modules (two up, two down) it will accommodate 14 course participants. Availability is slightly delayed due to a last-minute decision to excavate a full basement.
A closer view, with panoramic curvature.
A look without curvature. With this new building, Purusha hopes to offer other course variations in the near future, including Creating Coherence (afternoons are free) and TM Teacher Training.

Walking around, I noticed a few things. For one, erosion barriers are strategically placed on the roads.

In several places orchards are being started. They are surrounded by an unusual double electric fence.
Having two fences a foot or two apart thwarts the deer, whose depth perception is reputedly poor. They are reluctant to jump over something they can't suss out.

The gardens in front of the dining hall were being prepped for spring planting.

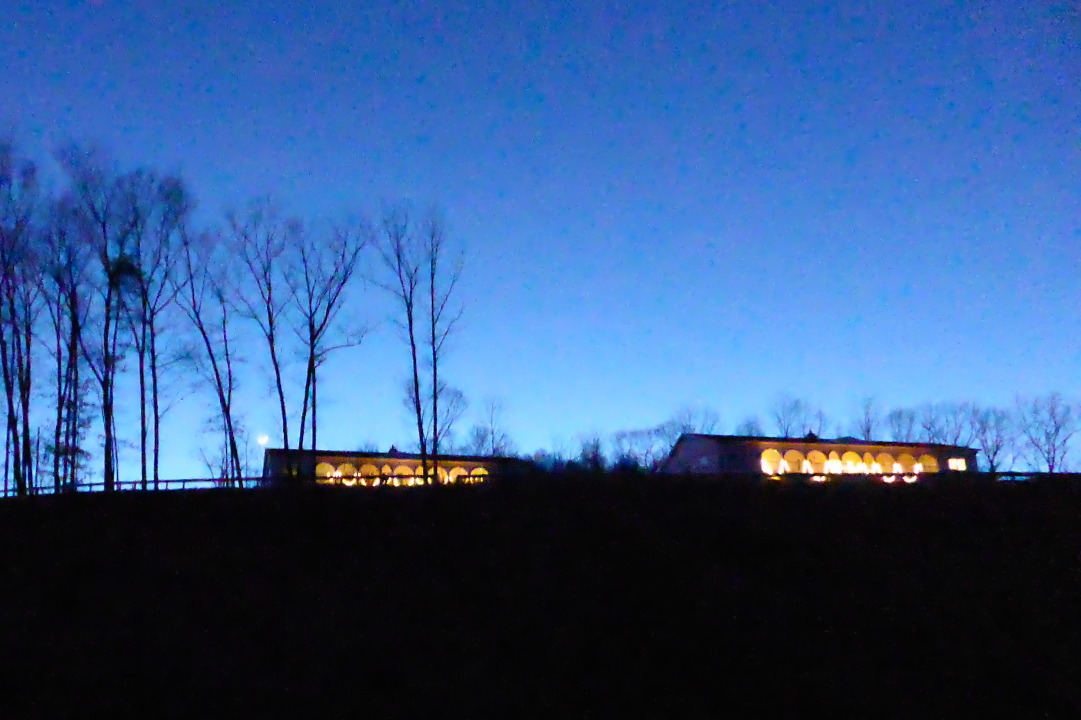
Walking back from the dining hall one evening, I took this twilight photo.

Down the hill, before reaching the campus, there is a tennis court.
From this court I tried to reach the Purusha lake, but a creek blocked my way. It's necessary to go out to the road first.
From a site a few feet higher the lake comes into view. Purusha do swim there.

The course itself was wonderful. The rhythm of life in Purushaland, with its lack of bustle and distraction, is settled and sharply different from that of Fairfield. There is no wandering downtown to visit restaurants and shops, for instance; the closest "downtown" is twelve miles away. Each location has its strong points, and I suspect I will continue to visit both.

The morning is spent following the meditation schedule. After lunch there is some time to stretch your legs. The afternoon and evening course meetings featured videos of Maharishi from the early 1970s, when he was bubbly and outgoing -- the so-called "giggling guru." His replies to questions were vivid, heartfelt, and candid. These early videos are cherished, as Maharishi's talks became less and less ebullient during the 1980s and 1990s.

If, after too much of an intensive meditation schedule, you're not sure what these hard objects are, there's a helpful sign.

Saturday, April 26, 2014

Standing Upright: the Ergo Desktop Kangaroo Pro

Early this year (2014) I decided to give a standing desk a try, based on its suggested health benefits. Joan had already launched into upright posture, having purchased a classy looking stand for her book reading. When I mentioned this to our friend Rickey, he mentioned an old saying, "The best way to kill your husband is to keep him sitting down. It's not rest and it's not exercise." 

After doing the usual Web research, I saw that an add-on to my small desk would be much more economical than buying an entirely new one, and that most new ones were too wide for my space. I ordered an Ergo Desktop Kangaroo Pro and received it in early March. It came as one large, heavy box,
with components and smaller boxes packed inside.
I unwrapped the base and lifter and put them onto a small table for assembly. The base is very heavy, as it needs to be for stability.
After bolting the lifter to the base, I attached the work surface to the lifter.
After loosening the main brake (one of the black knobs on the lifter) you can adjust the height of the work surface. It neither shoots towards the top nor crashes down when the brake is released; its natural tendency is to stay put because the mechanism includes oil dampened springs! You pull or push to change the height of the work surface, which is a good thing.

The work surface can be raised up to 15 inches. On a 30-inch-tall desk this accommodates users up to 6'2" tall, according to the manufacturer. The work surface can be raised up to 16.5" by adjusting a stopping bolt on the tower, but this raises it into the oil dampening zone of the spring, making it a little harder to lower the unit.

A VESA mount is included for attaching your monitor to the tower. In this photo I've attached it to the back of mine.
The mount fits into a receiver on the tower. The height of the monitor can be adjusted independently of the work surface after releasing the monitor brake. Swinging the monitor from side to side is easy, but changing the tilt is more work. A screw must be loosened, the tilt adjusted, and then the screw re-tightened before your grip on the monitor weakens. Or, if you are lucky, you can adjust the screw into the narrow sweet spot where it's tight enough to maintain the tilt but loose enough to allow you to change it when gripping the monitor with both hands.
Here is a photo of the end result. Both the work surface and the monitor are deployed at the standard maximum height because I'm 6'3" tall.
Note how much more desk space I have -- it's a computer townhouse! My little computer, Juno, fits nicely under the work surface! Ergo Desktop also includes an adjustable stabilizer leg, visible in the photo. Have another look.

How does it feel to stand at the computer? For short periods was fine, after I got the monitor tilt where I wanted it. But after an hour my back would start to ache, and although I've toughened up, my back still needs a break after 90 minutes or so. For an extended work session the solution would be a tall stool so that I could take a sit-break without adjusting and re-adjusting the setup. I expect to get around to that.

I'm pleased with my purchase of the Kangaroo Pro.

To round out this post, here's a photo of Joan's reading stand.


Friday, April 18, 2014

Juno Gets a New House

In January (2014) I moved my computer, Juno, into a new case. In part I did this to reclaim some desktop space, and in part to scratch an itch to work on a computer. It wasn't time yet to assemble a new computer; although Juno is four years old, I'm fine with waiting for one more generation of CPUs to arrive.

The old case, a Silverstone SG05, is a shoebox case -- not too tall, but relatively deep. The new case, a Lian-Li PC-Q03, is more of a refrigerator case ... square and tall.
Here is the box for the PC-Q03 as delivered:
I purchased it from an Ebay store, in preference to Newegg or Amazon, based solely on price. The case itself was well protected inside the manufacturer's box.
Here is a side view after all the packaging has been removed.
I hadn't realized that the PC-Q03 now included an adapter cable to allow the front USB ports, USB 3.0, to be used with a motherboard that had only USB 2.0 ports, as I did (see the sticker on the first photo). This made my previous purchase of such an adapter unnecessary, lesson #1. The supplied adapter was stiff, and made a long cable that much longer, but it worked fine.
I had also purchased an adapter plate that would fit the opening for the power supply, which I didn't need, and included an 80mm fan.
The fan was a PWM (Pulse Width Modulation) version, however, which my computer wasn't prepared to play with except with some cabling gymnastics, so instead I used a regular 3-pin 80mm fan I had in my spare parts box.

I had formulated a plan for modifying the new case. My idea was to cut a hole for a fan in the bottom plate of the case, which would suck air into the case through a filter. This technique of blowing filtered air into the case is called "positive pressure," and such computers accumulate dust more slowly than computers where fans push air out of the case, "negative pressure," which pulls unfiltered air into the case through any available opening.

To allow better airflow to this bottom fan, I purchased higher feet for the case. The original feet were tiny nubs.

Hole Cutting
I prepared to cut the hole for a 92mm fan in the bottom of the case. I taped newspaper all around so that metal filings wouldn't be strewn through the interior of the case when I finished.
This was my first go at cutting a circle in metal. I used a Dremel attachment that put the Dremel at the end of an arm, and various drill bits. The bits were likely not the best choice, as I broke a couple in the process, but I was already well underway before I realized it. There were plenty of filings.
After cleanup, this is what I had.
You can see the scratches where the guiding arm rubbed against the case -- lesson #2. Some protective tape was needed. And, although I measured several times, my technique was off, and the hole was slightly oblong (by 1 or 2 mm) and, overall, a few millimeters too large for the fan filter, which seemed slightly undersized -- lesson #3. I was learning a lot in case I ever cut into a case again.

I made a cardboard ring (three or four layers of cardboard, to match the thickness of the case) to shrink and circularize the hole.

Attaching the filter to the hole I'd cut in the bottom proved problematic. The first step, because the case is not magnetic (it's aluminum), was sticking on an adapter ring that's magnetic but has adhesive on one side.
When I put the magnetic filter on, at first things looked good. We'll revisit this portion of the case's anatomy later.


Storage Devices
I planned to stack Juno's two 2.5" storage devices, an SSD (Solid State Drive) and a hard drive' to save space, using a mounting kit. I cut the two side extensions off because I wasn't going to install the kit in a 3.5" bay.
I went with the centered hole in the case bottom, as previously described, because it looked like having both the drives and a fan on the bottom would be a tight squeeze, even with just an 80mm fan.
I seriously considered a vertical stance for the drives. Here I've placed the mounting kit and a 92mm fan inside the case to check the fit.
Here is another vertical stance test, after the hole was cut and the drives were mounted in the kit. Note that I'm using "slim" SATA cables for the drives, rather than the typical thickness of cable. This later proved to be a godsend.
I worried about access to the drive cables when the front port cables were reinstalled. With the PC-Q03 case, there is one and only one way to stick your hand in once the motherboard is installed, through the side panel. Here's the picture showing those front cables again.
When I did a trial insertion of the motherboard, and saw how little space remained, I gave up on having both the drives and a pusher fan in the case. I centered the drives on the floor, above the hole I had so laboriously cut.

Motherboard Prep
Now it was time to take the guts of Juno out of the old case.
Here the motherboard has been removed. The yellow gadget plugged into the ATX power connector, in front, is a picoPsu 150 XT. Note that the CPU cooling fan is as wide as the motherboard itself.
There were to tasks to perform before installing into the new case. First, the CPU heatsink would be in the "forbidden orientation" there. In the SG05, the motherboard was horizontal, and so the relationship of the copper heatpipes (which you can glimpse above, click to enlarge) to gravity was the same no matter how it was turned. In the PC-Q03, the motherboard is mounted vertically, and it is recommended that the heatpipe bends not be oriented above the heatsink. The heatpipes function primarily by capillary action, and we don't want that force to be hindered by gravity.

Second, it was time to properly fix the issue with the heatsink over the Nvidia 730i MCP (memory controller and integrated graphics). One of the pushpins had failed a while back, as documented here; the quick fix had been a partial success, as that chip then ran much hotter than before, but still within its limits. Now it was time to do it right.

Here the two heatsinks have been removed, and we can see the old thermal paste on both heatsinks and chips. That gets cleaned off.
The cleaned CPU chip.
The cleaned CPU heatsink. There is some staining on the copper, but that doesn't matter.
The cleaned Nvidia 730i,
And its cleaned heatsink.
I applied fresh thermal paste, and reassembled the components. This time a nut-and-bolt was used for both fasteners of the 730i heatsink, and I discarded the old pushpin. The 730i now runs 10º-15º C cooler! In this photo I haven't reattached the CPU fan yet, but you can see the black cross-bracket to which the fan attaches.

Final Assembly
In the PC-Q03, the motherboard is first attached to a separate mounting tray, which we can see again here on the far wall of the case. There is also a tray for a slim optical (CD/DVD) drive at the top.
I tried valiantly to insert the motherboard, but there was interference with the optical drive tray. The CPU heatsink was a few millimeters too wide. I clipped the black fan frame, and I tried different techniques of coaxing the motherboard tray into the case, but it just wasn't going to work. I had to remove the optical drive tray, and tape the faceplate to the case. (If you remove the optical drive tray from the SG05, you can screw the faceplate back in.) I purchased a external, plug-in optical drive instead. Lesson #4: be careful when considering a heatsink or fan that will extend beyond the edge of the motherboard.

Then I had trouble getting the side of the motherboard with all the I/O ports to align with the aluminum I/O shield. We'll have a photo of that in a moment. After snipping out a few small pieces of the shield I finally had success. Because the motherboard and its I/O shield both fit nicely in the SG05, I suspect some minor misalignment or out-of-squareness in the PC-Q03, likely with the attachment points for the motherboard tray.

Now it was time to attach a plethora of cables, wires, and small connectors to the motherboard. The front USB ports and status lights, audio connectors, and LED connectors were some of these. Then there were the fan cables, one for the CPU fan and one for the fan attached to the adapter plate mentioned earlier, and the power cables and slim data cables for the two storage drives. The wide CPU heatsink further constricted access to the motherboard. It was crowded in there, and my frustration level rose. Needle-nosed pliers and a headlamp were a must. With the SG05, you could insert your hand from top or from either side, while with the PC-Q03, I had one and only one choice. Finally, it was done. Lesson #5: consider the "degrees of access" for working inside a case; here, the SG05 had 3 while the PC-Q03 had 1.

Here's a view into the interior of the assembled system. The blue gadgets holding the 80mm fan to the back of the case are made of silicone, and help isolate vibrations of the fan from the case itself.
Some of the cabling mess is shoved to the exterior of the back, where nobody will see it.
In particular, the two Zalman fanmate controllers, which allow me to speed up or slow down each fan independently, are just slapped to the back, at bottom, with double-sided tape. It works. The silvery plate at left is the I/O shield mentioned before.

Then I discovered that the filter for the hole I'd cut stuck only weakly to its adapter ring. I ended up using some gaffer tape to keep it in place, but even then, it falls off every few weeks. This could be due to unevenness under the adhesive ring, or air turbulence in the case, or maybe it's not expected to function upside-down, or maybe the filter or adapter is just from a bad batch.
The finished system looks great on the desktop, with any ugliness hidden in the back. There's 2½ inches more open desktop in front of the computer. My mouse is free to roam.
Here's a closeup.
That blue power LED is also the on/off button, and it's much better than the one on the SG05, which was too bright. The SG05 had a second, small LED for a disk activity indicator which also was too bright. Disk activity on the PC-Q03 causes a red LED to light behind the power button face, and the combined blue and red gives it a violet hue. I like the approach.

I'm happy with this micro-refrigerator shape for a desktop computer. When the time comes in the next year to build a new computer, I'm tempted by the Jonsbo V3, marketed in the USA both as both a 'Rosewill Legacy V3' and as a 'DIYPC V3'.

  • It's very close in size to the PC-Q03 -- 3mm wider, 3mm deeper, and 1mm shorter.
  • There's no optical drive opening, which is fine since I now have an external optical drive anyway.
  • There is already ventilation in the bottom.
  • The bottom is detachable, which would made installing the fiddly cables and wires much easier.
  • The left (non-motherboard) side panel is perforated for even more ventilation.
Here are two images from the web illustrating the V3 case.

I'm contemplating a design that will require only one fan for a well-cooled positive-pressure case. It would require some metal cutting in the back, but the shape required would be suitable for using a metal nibbler instead of a drill or Dremel. Should be much less messy and easier to control.

There are even smaller cases in this style, the Jonsbo V2 and Lian Li PC-Q02, but working in an even smaller space would be tough. Plus, they are not carried by the usual retailers and I'd need to find them on eBay. There's no reason to use such a small case, except for bragging rights.

 Stay tuned!