Showing posts with label juno. Show all posts

Sunday, March 13, 2016

Juno's Final Upgrade

Juno, my desktop computer, started out in early 2010 with a 40 gigabyte (GB) solid state drive (SSD) to hold the operating system, and a 500 GB hard drive to hold everything else. (An SSD is much faster than a regular hard drive.) About 2½ years later, I upgraded Juno to a 128 GB SSD (Samsung 830), putting aside the 40 GB drive (an Intel X25-V). Now the SSD could hold my personal files as well, excepting all the photos and videos, which still resided on the hard drive (Hitachi 2.5" 7200 rpm). This further improved Juno's peppiness. In early 2014 I moved Juno into a new case, just for the purpose of taking up less room on my desk.

Juno is equipped with 4 gigabytes of RAM (main memory). This was plenty starting out six years ago, but now, when I have my email program, web browser, thumbnail viewer, and photo editor running, they don't all fit into memory at the same time. A process called "swapping" takes place; the operating system (Linux in this case) picks something residing in memory that hasn't been active for a while and copies that to the hard drive, freeing up RAM for the program that needs more memory.

Swapping slows everything down. Badly. Click to bring a program to the front, and hear the little hard drive chittering away as it writes stuff out to make room for that program, and fetches the previously swapped-out program. Sometimes it can take 10 seconds.

I decided to experiment with reusing the old 40 GB SSD as the swap drive. In the early days this was discouraged, because it could lead to premature wearing out of the SSD. However, because Juno swaps only during peak loads, and because I anticipate needing only a year of service before building a fresh computer, I decided to go ahead. The alternative, buying more RAM, would have been more expensive and much more work -- disconnecting cables from the motherboard, removing the motherboard, and then removing the heatsink from the motherboard to access the RAM slots. Ugh.

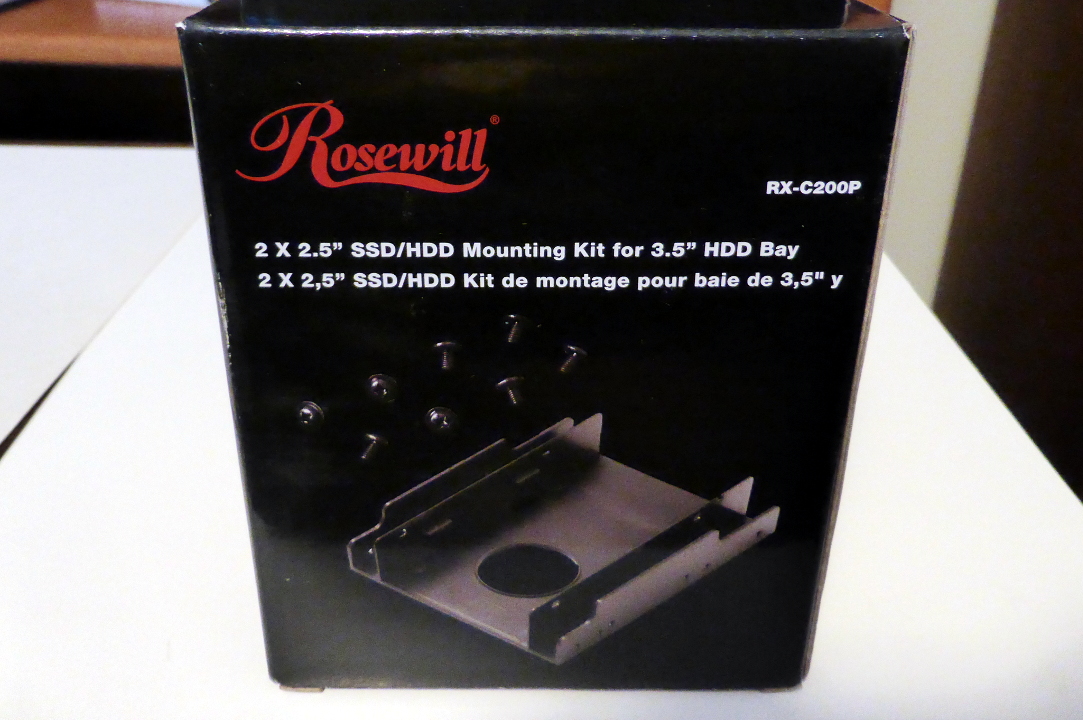
Juno has one available SATA connector on the motherboard which could accomodate the SSD, but the interior of the computer is cramped after the transplant to the new case. I decided to use the external SATA port (eSATA) of the computer, and place the SSD in an enclosure to connect it in a tidy fashion. I chose one from Oyen Digital, which comes with any cable I might conceivably need, and ordered from Amazon.

Here is the opened box. In case you need lots of oomph, a wall-wart AC adapter is also included.
Here the old SSD has been inserted into the tray that pulls out of the adapter's housing.
It didn't work at first. After spending some time trying alternatives, including using a spare 2.5" HDD instead of the SSD, I finally figured out two things. First, the eSATA cable isn't carrying power, so I had to additionally plug in the supplied USB to DC-in cable. Second, although there was stuff on the SSD, an icon for it did not appear on the desktop even when the power issue was resolved. Disk drives and thumb drives plugged into the USB ports result in desktop icons, but the eSATA port apparently does not. Once I figured out that the lack of an icon didn't indicate a problem, everything began to work. Here's a view of the back of the enclosure, with the two cables.
This is how it looks from the front. The little box on top is the enclosure; its blue LED light is a power indicator.
When all goes well and the swapping takes place on the SSD instead of the HDD, a heavy-swapping situation induces a silent, 1 or 2 second lag instead of 10 seconds of disk chatter. That's pleasing. However, after a day I ran into problems.

Inspecting the system log (/var/log/syslog), I could see that sometimes the connection was established at full speed (3.0 Gbps). Just as often, however, Juno would back down to 1.5 Gbps. This wasn't fatal, but it was odd.

Then, while shorter sleeps ("suspend to RAM") appeared to work OK, the overnight sleep was a problem. (Interestingly, the LED indicated that the SSD had power even while the computer was asleep.) The connection to the external SSD would suffer several timeouts, and when the computer finally came up, the Internet connection was down. That should be unrelated, but a consistent coincidence isn't a coincidence, is it? 

I found messages that indicated some kind of SSD corruption; for example, the serial number of the SSD came out wrong -- it looked like a fragment of a pathname. I performed a factory reset with the command "hdparm --yes-i-know-what-i-am-doing --dco-restore /dev/sdc" and then the data from "smartctl --info /dev/sdc" looked sane again. However, I still had the problem the next morning.

It was time for step-by-step testing.

Test #1: turn off and remove the external device. Overnight wakeup is OK.

Test #2: install external device, but don't power it up. Overnight wakeup is OK, as you would expect.

Test #3: power up external SSD, but don't use it for swap or anything else.

At power-on:

Mar  6 14:32:43 juno kernel: [38604.492274] ata4: irq_stat 0x00000040, connection status changed
Mar  6 14:32:43 juno kernel: [38604.492278] ata4: SError: { PHYRdyChg CommWake LinkSeq TrStaTrns DevExch }
Mar  6 14:32:43 juno kernel: [38604.492286] ata4: hard resetting link
Mar  6 14:32:44 juno kernel: [38605.328024] ata4: SATA link up 3.0 Gbps (SStatus 123 SControl 300)
Mar  6 14:32:44 juno kernel: [38605.328241] ata4.00: ATA-7: INTEL SSDSA2M040G2GC, 2CV102M3, max UDMA/13
Mar  6 14:32:44 juno kernel: [38605.328245] ata4.00: 78165360 sectors, multi 1: LBA48 NCQ (depth 31/32)
Mar  6 14:32:44 juno kernel: [38605.328478] ata4.00: configured for UDMA/133
Mar  6 14:32:44 juno kernel: [38605.328506] ata4: EH complete

After overnight sleep: everything was OK!

Test #4: activate the SSD as a swap device, and don't turn it off overnight. (I reduced the size of the swap area from the entire 40 GB to 12 GB, just in case it was too much. Twelve is still 50% larger than the swap area on the hard drive.)

Everything is OK! Hmm. Also, there has been no resetting the link down to 1.5 Gbps from 3.0. Perhaps the factory reset on the SSD followed by turning it off and back on fixed something?!

Test #5: turn off the HDD swap device, "swapoff /dev/sdb1," so that the SSD is the only swap device. Overnight? Still OK!

This will probably be Juno's last upgrade -- six years is a long time in the computer world. The next project will be to build a new one.

Friday, April 18, 2014

Juno Gets a New House

In January (2014) I moved my computer, Juno, into a new case. In part I did this to reclaim some desktop space, and in part to scratch an itch to work on a computer. It wasn't time yet to assemble a new computer; although Juno is four years old, I'm fine with waiting for one more generation of CPUs to arrive.

The old case, a Silverstone SG05, is a shoebox case -- not too tall, but relatively deep. The new case, a Lian-Li PC-Q03, is more of a refrigerator case ... square and tall.
Here is the box for the PC-Q03 as delivered:
I purchased it from an Ebay store, in preference to Newegg or Amazon, based solely on price. The case itself was well protected inside the manufacturer's box.
Here is a side view after all the packaging has been removed.
I hadn't realized that the PC-Q03 now included an adapter cable to allow the front USB ports, USB 3.0, to be used with a motherboard that had only USB 2.0 ports, as I did (see the sticker on the first photo). This made my previous purchase of such an adapter unnecessary, lesson #1. The supplied adapter was stiff, and made a long cable that much longer, but it worked fine.
I had also purchased an adapter plate that would fit the opening for the power supply, which I didn't need, and included an 80mm fan.
The fan was a PWM (Pulse Width Modulation) version, however, which my computer wasn't prepared to play with except with some cabling gymnastics, so instead I used a regular 3-pin 80mm fan I had in my spare parts box.

I had formulated a plan for modifying the new case. My idea was to cut a hole for a fan in the bottom plate of the case, which would suck air into the case through a filter. This technique of blowing filtered air into the case is called "positive pressure," and such computers accumulate dust more slowly than computers where fans push air out of the case, "negative pressure," which pulls unfiltered air into the case through any available opening.

To allow better airflow to this bottom fan, I purchased higher feet for the case. The original feet were tiny nubs.

Hole Cutting
I prepared to cut the hole for a 92mm fan in the bottom of the case. I taped newspaper all around so that metal filings wouldn't be strewn through the interior of the case when I finished.
This was my first go at cutting a circle in metal. I used a Dremel attachment that put the Dremel at the end of an arm, and various drill bits. The bits were likely not the best choice, as I broke a couple in the process, but I was already well underway before I realized it. There were plenty of filings.
After cleanup, this is what I had.
You can see the scratches where the guiding arm rubbed against the case -- lesson #2. Some protective tape was needed. And, although I measured several times, my technique was off, and the hole was slightly oblong (by 1 or 2 mm) and, overall, a few millimeters too large for the fan filter, which seemed slightly undersized -- lesson #3. I was learning a lot in case I ever cut into a case again.

I made a cardboard ring (three or four layers of cardboard, to match the thickness of the case) to shrink and circularize the hole.

Attaching the filter to the hole I'd cut in the bottom proved problematic. The first step, because the case is not magnetic (it's aluminum), was sticking on an adapter ring that's magnetic but has adhesive on one side.
When I put the magnetic filter on, at first things looked good. We'll revisit this portion of the case's anatomy later.


Storage Devices
I planned to stack Juno's two 2.5" storage devices, an SSD (Solid State Drive) and a hard drive' to save space, using a mounting kit. I cut the two side extensions off because I wasn't going to install the kit in a 3.5" bay.
I went with the centered hole in the case bottom, as previously described, because it looked like having both the drives and a fan on the bottom would be a tight squeeze, even with just an 80mm fan.
I seriously considered a vertical stance for the drives. Here I've placed the mounting kit and a 92mm fan inside the case to check the fit.
Here is another vertical stance test, after the hole was cut and the drives were mounted in the kit. Note that I'm using "slim" SATA cables for the drives, rather than the typical thickness of cable. This later proved to be a godsend.
I worried about access to the drive cables when the front port cables were reinstalled. With the PC-Q03 case, there is one and only one way to stick your hand in once the motherboard is installed, through the side panel. Here's the picture showing those front cables again.
When I did a trial insertion of the motherboard, and saw how little space remained, I gave up on having both the drives and a pusher fan in the case. I centered the drives on the floor, above the hole I had so laboriously cut.

Motherboard Prep
Now it was time to take the guts of Juno out of the old case.
Here the motherboard has been removed. The yellow gadget plugged into the ATX power connector, in front, is a picoPsu 150 XT. Note that the CPU cooling fan is as wide as the motherboard itself.
There were to tasks to perform before installing into the new case. First, the CPU heatsink would be in the "forbidden orientation" there. In the SG05, the motherboard was horizontal, and so the relationship of the copper heatpipes (which you can glimpse above, click to enlarge) to gravity was the same no matter how it was turned. In the PC-Q03, the motherboard is mounted vertically, and it is recommended that the heatpipe bends not be oriented above the heatsink. The heatpipes function primarily by capillary action, and we don't want that force to be hindered by gravity.

Second, it was time to properly fix the issue with the heatsink over the Nvidia 730i MCP (memory controller and integrated graphics). One of the pushpins had failed a while back, as documented here; the quick fix had been a partial success, as that chip then ran much hotter than before, but still within its limits. Now it was time to do it right.

Here the two heatsinks have been removed, and we can see the old thermal paste on both heatsinks and chips. That gets cleaned off.
The cleaned CPU chip.
The cleaned CPU heatsink. There is some staining on the copper, but that doesn't matter.
The cleaned Nvidia 730i,
And its cleaned heatsink.
I applied fresh thermal paste, and reassembled the components. This time a nut-and-bolt was used for both fasteners of the 730i heatsink, and I discarded the old pushpin. The 730i now runs 10º-15º C cooler! In this photo I haven't reattached the CPU fan yet, but you can see the black cross-bracket to which the fan attaches.

Final Assembly
In the PC-Q03, the motherboard is first attached to a separate mounting tray, which we can see again here on the far wall of the case. There is also a tray for a slim optical (CD/DVD) drive at the top.
I tried valiantly to insert the motherboard, but there was interference with the optical drive tray. The CPU heatsink was a few millimeters too wide. I clipped the black fan frame, and I tried different techniques of coaxing the motherboard tray into the case, but it just wasn't going to work. I had to remove the optical drive tray, and tape the faceplate to the case. (If you remove the optical drive tray from the SG05, you can screw the faceplate back in.) I purchased a external, plug-in optical drive instead. Lesson #4: be careful when considering a heatsink or fan that will extend beyond the edge of the motherboard.

Then I had trouble getting the side of the motherboard with all the I/O ports to align with the aluminum I/O shield. We'll have a photo of that in a moment. After snipping out a few small pieces of the shield I finally had success. Because the motherboard and its I/O shield both fit nicely in the SG05, I suspect some minor misalignment or out-of-squareness in the PC-Q03, likely with the attachment points for the motherboard tray.

Now it was time to attach a plethora of cables, wires, and small connectors to the motherboard. The front USB ports and status lights, audio connectors, and LED connectors were some of these. Then there were the fan cables, one for the CPU fan and one for the fan attached to the adapter plate mentioned earlier, and the power cables and slim data cables for the two storage drives. The wide CPU heatsink further constricted access to the motherboard. It was crowded in there, and my frustration level rose. Needle-nosed pliers and a headlamp were a must. With the SG05, you could insert your hand from top or from either side, while with the PC-Q03, I had one and only one choice. Finally, it was done. Lesson #5: consider the "degrees of access" for working inside a case; here, the SG05 had 3 while the PC-Q03 had 1.

Here's a view into the interior of the assembled system. The blue gadgets holding the 80mm fan to the back of the case are made of silicone, and help isolate vibrations of the fan from the case itself.
Some of the cabling mess is shoved to the exterior of the back, where nobody will see it.
In particular, the two Zalman fanmate controllers, which allow me to speed up or slow down each fan independently, are just slapped to the back, at bottom, with double-sided tape. It works. The silvery plate at left is the I/O shield mentioned before.

Then I discovered that the filter for the hole I'd cut stuck only weakly to its adapter ring. I ended up using some gaffer tape to keep it in place, but even then, it falls off every few weeks. This could be due to unevenness under the adhesive ring, or air turbulence in the case, or maybe it's not expected to function upside-down, or maybe the filter or adapter is just from a bad batch.
The finished system looks great on the desktop, with any ugliness hidden in the back. There's 2½ inches more open desktop in front of the computer. My mouse is free to roam.
Here's a closeup.
That blue power LED is also the on/off button, and it's much better than the one on the SG05, which was too bright. The SG05 had a second, small LED for a disk activity indicator which also was too bright. Disk activity on the PC-Q03 causes a red LED to light behind the power button face, and the combined blue and red gives it a violet hue. I like the approach.

I'm happy with this micro-refrigerator shape for a desktop computer. When the time comes in the next year to build a new computer, I'm tempted by the Jonsbo V3, marketed in the USA both as both a 'Rosewill Legacy V3' and as a 'DIYPC V3'.

  • It's very close in size to the PC-Q03 -- 3mm wider, 3mm deeper, and 1mm shorter.
  • There's no optical drive opening, which is fine since I now have an external optical drive anyway.
  • There is already ventilation in the bottom.
  • The bottom is detachable, which would made installing the fiddly cables and wires much easier.
  • The left (non-motherboard) side panel is perforated for even more ventilation.
Here are two images from the web illustrating the V3 case.

I'm contemplating a design that will require only one fan for a well-cooled positive-pressure case. It would require some metal cutting in the back, but the shape required would be suitable for using a metal nibbler instead of a drill or Dremel. Should be much less messy and easier to control.

There are even smaller cases in this style, the Jonsbo V2 and Lian Li PC-Q02, but working in an even smaller space would be tough. Plus, they are not carried by the usual retailers and I'd need to find them on eBay. There's no reason to use such a small case, except for bragging rights.

 Stay tuned!

Thursday, February 28, 2013

Upgrading Juno

Towards the end of 2012 I upgraded my desktop computer, Juno, in several ways. I replaced the original solid-state drive (SSD) with a larger, newer one, I upgraded the BIOS, and I took a two-year leap in the software installed.

SSD swap
Juno was constructed with an Intel X25-V, a value-oriented 40 gigabyte SSD.
This device was large enough to hold the operating system (Linux) and applications, but all my user data was stored separately, on a regular spinning-platter hard drive. SSD drives were and are more expensive than regular hard drives, although now not so much as 3 years ago. Having the operating system and apps on the SSD made Juno fast to boot and fast to launch applications.

My choice to replace it was a Samsung 830, the 128 gigabyte version.
With this size, I could keep not only the operating system and applications on the SSD, but also all my user data except the extensive photograph folder, which remains on the hard drive. The Samsung device, being of a newer generation and not designed as a "value" item (not compromised to reduce cost) is, according to the specs, three times faster reading data and ten times faster writing data than the X25-V.

Fortunately, I also discovered while researching which SSD to purchase that SSDs using the new SandForce controller (interface between the SSD memory and the rest of the computer) did not play well with the I/O chip on my motherboard, the Nvidia MCP79. Many SSDs such as Intel, Corsair, and others now use the SandForce controller.

The MCP79 supports device speeds of 1.5 Gb/sec and 3.0 Gb/sec. (The newer SSDs also support 6.0 Gb/sec.) When the MCP79 negotiates the connection speed with a SandForce controller, they end up using the 1.5 Gb/sec setting instead of 3.0 Gb/sec! The Samsung SSDs use a Samsung controller and have no such problem. This, plus the excellent reviews of the 830, made the choice an easy one.

When I took the faceplate off Juno, it was clear that the dust filter needed to be cleaned again.
A dust vacuum wasn't sufficient; I ended up removing the filter and washing it.

Juno is constructed with the SSD installed in a drive bay underneath the optical (CD/DVD) drive. Thus, the first step was to remove the tray for the drive and disconnect the cables.
Here we see the Intel X25-V still in the drive bay.
Installing the Samsung was just a matter of removing the Intel (4 screws) and sliding in the Samsung, reinserting the 4 screws and reattaching the cables. By then the filter was dry, and I could reassemble Juno.
The upgraded system is certainly snappier than before. I'm pleased with it.

BIOS Upgrade
My motherboard, the Zotac gf9300-i-e, theoretically supported both methods of chatting with bulk storage devices such as hard drives and SSDs. The ATA specification is the much older of the two, and to support advanced features of newer hard drives and of SSDs there is the newer AHCI interface. However, when first building Juno, it became clear that the AHCI option didn't work. In fact, if I enabled AHCI in the motherboard's BIOS (embedded firmware), the computer would no longer see any of the attached devices: no hard drive, no SSD, no CD/DVD drive. Urk! I proceeded in ATA mode, which seemed to work well enough.

After swapping the SSDs I decided to try AHCI mode again. Same result, very disappointing. However, this time I stumbled across a Zotac forum posting mentioning a BIOS upgrade that had come out a few months after I assembled Juno, which solved this problem. There were some technical hurdles to overcome -- this motherboard, unlike some others, won't recognize a BIOS upgrade automatically if a USB stick is plugged in -- but eventually I applied the new BIOS, and voilá, AHCI mode was good! 

Installing XUbuntu 12.10
I had ceased installing newer versions of Ubuntu, sticking with 10.10, because of the controversy over the new default user interface, Unity, and the changes in the GNOME desktop between version 2 and 3. I was happy with my GNOME 2.x desktop, and 10.10 was supported with updates and security patches for 18 months. Then those stopped. After two years on 10.10, Juno's software was showing its age and some new software packages would not install.

I had played around with some other packages on my ancient laptop, primarily LMDE (Linux Mint Debian Edition) with its Cinnamon and Mate desktops. But I wasn't completely pleased with Cinnamon or Mate, which were efforts to maintain a pre-Unity desktop environment. Finally I went with XUbuntu, which is an Ubuntu distribution that also installs a more traditional and lightweight desktop manager, xfce. I have a few quibbles with it, but xfce was my best fit.

Here are some miscellaneous points I noticed:
  • The system will now wake up from sleep (suspend to RAM) when I press any key on the keyboard. Previously I had to push the power button. Hurrah!
  • xfce can use either xfwm4, the standard xfce desktop compositor, or compiz, a fancier one. (Desktop compositors manage visual issues such as overlapping windows, partially transparent windows, wobbly windows, multiple workspaces, etc.) I finally decided that xfwm4 was more stable; occasionally windows would go black under compiz. I was willing to give up my wobbly windows for reliability.
  • Some of the programs I use on a regular basis, such as the GIMP, an open-source Photoshop, were not installed by default. They can still be installed from the Ubuntu repositories, so it's not a large issue.
  • LibreOffice, as distributed by Ubuntu, would crash on some of the spreadsheets I had created in the Ubuntu 10.10 environment. I filed a bug report, and it may be fixed in the next release. In the meantime, I installed OpenOffice, which worked just fine. Because of a file name conflict, I had to remove LibreOffice before I could install OpenOffice.
  • The xfce desktop has, unfortunately, a mandatory snap-to-grid feature. That is, any icons/documents placed on the desktop are automatically lined up to use the center of one square of an invisible checkerboard dividing the desktop. I wish I could turn it off, as I could in GNOME 2.x. But I don't have very many desktop items anyway, so it's just an annoyance rather than an impedance to my workflow.
  • The version of the C++ compiler supplied jumped forward two years as well. One of my programming projects would crash until I changed some global constructor usages that had worked OK with the older compiler.
  • The audio/video command-line program ffmpeg is now deprecated, and a couple of the arguments have changed. The new version fails on some of my video projects where the old one did not -- arrgh! However, the program avconv, the immediate descendant of ffmpeg, did work. It leaves me wondering how or why the maintainers managed to break ffmpeg.

Going Forward
This is probably the end of the Juno upgrades. If it were inexpensive, I would increase the memory (RAM) from 4 GB to 8 GB, because sometimes when working on blog entries (many tabs open on the Web browser) and processing photos or videos Juno starts to swap (move some programs to disk to make room for other programs to run). This slows things down. However, this motherboard takes an obsolescent memory, DDR2-800, which is pricey when available. Perhaps next fall or winter I will build my next computer based on the upcoming Haswell generation of Intel CPUs, and I'll put 16 GB of memory in it. That would be enough RAM to allow me to experiment with virtual machines.


Wednesday, March 7, 2012

Computer Housecleaning

I finally got around to checking the air filter on my computer, juno, last month. It had been two years since I built juno, and I should have inspected the filter after just one. After removing the front cover, this is what I saw:
It was actually worse than it looks. Dust fell off as I removed the front cover, and what you see is what was left!

Juno operates on the "positive pressure" principle. A fan pulls cool air into the case through a filter (seen above), creating a positive pressure inside. This fan ensures that the heated air inside is pushed out through the ventilation grilles and seams in the case, while the intake filter keeps the dust outside. With a "negative pressure" setup, also common, a fan pushes hot air out of the case, causing the cooler outside air to be pulled in through every grille and seam, carrying dust with it.

As you can see in this photo, the filter did its job, even as clogged as it was ... the interior of juno had little dust.

I'm definitely moving to a once-a-year schedule, perhaps more often if I detect the filter turning grey again.

Wednesday, March 17, 2010

Further Education with juno

Now that I've been working with juno for a few weeks, I have a few updates.
  • I found the setting that preventing booting and locked me out of the BIOS. Twice. If I chose "AHCI" or "Linux AHCI" instead of "IDE" for the SATA interface -- that which talks to the various storage devices, including the optical drive, hard drive, and SSD -- I got my unbootable lockout. So, having had to open the case and reset a jumper twice to get back to defaults, I know to avoid these! (Theoretically they should work. Theoretically.)
  • The memory (RAM) was rated at 1.8-1.9 volts. The motherboard auto-chose 1.9 volts. I decided to manually set it to 1.8 volts, and it still works fine, even under the stress test. The idle power consumption edged down from 30 watts to 29 watts.
  • It looks like the CPU temperature reporting isn't fully locked at 42°C, but rather won't report anything less than that. During some of the stress tests I saw brief flickers up to 43°C, leading me to believe that the sensors are alive. This summer, when the room temperatures are 5°-6°C higher than now, the sensors are more likely to wake up during the stress tests.
  • I've been slowly experimenting with overclocking -- running the CPU and memory at faster than the rated speeds. The bog-standard default for juno's equipment is 2.93GHz for the CPU, and 800MHz for the RAM. Gradual bumps in speed have been followed by stress testing, so that I know sooner rather than later that it's gone too far. By now, juno is up to 3.16 GHz / 864 MHz. I've left the CPU and RAM "linked" -- overclocking in tandem. If I care to, I can unlink them, so that, for instance, I could continue to bump the CPU speed without taking the memory further than it can go. That juno can accomplish this with the -.10v undervolt of the CPU and the 1.8v setting on the RAM shows how some parts are binned by demand rather than quality. That is, my CPU may be a perfectly good 3.06 GHz or better part, but Intel needed more of the less expensive 2.93 GHz parts to sell, and fixed it as such. In any case, I plan to be conservative, and back off a couple of steps when either 1) the stress test starts to throw errors, or 2) the power consumption starts to climb more than a watt or two.
  • I may also experiment in future with the power consumption response to deliberately underclocking the system.
 

Friday, March 5, 2010

Assembling Juno: Installing and Results

With the first power-on, juno responded as hoped: the BIOS identified all the peripherals correctly, and then noted that no device contained any operating system to boot. I did a restart and went into the BIOS to change several settings (time, splash screen, boot order, etc.) and rebooted with a CD. Or rather, I tried to reboot with a CD. Even though I tried several bootable CDs, juno refused to even try to boot from them. It was as if juno would boot only from the first device and failed to check the others. Time to go into the BIOS again. But wait ... the system no longer responded to the DEL key. I couldn't get into the BIOS, even with several attempts! Eventually I had to switch a jumper to reset the motherboard to its factory default settings, and then, as if having enjoyed the attention, juno has never since failed to recognize a bootable device (including a USB memory stick) or to respond to the DEL key. I have changed most of the BIOS parameters again (one at a time), with no ill effect. Sometimes I think computers must go through a learning process when they first wake up or move to a new environment, and exhibit behaviors that disappear after a single baffling appearance.

The first job was to properly set up the SSD (solid state, or flash memory, drive). Including this part was one of the two less conservative items in juno's constitution. SSDs are relatively new, and early adopters (the last 18 months) have seen drives that slowed down over time, turned into expensive paperweights after applying a manufacturer's upgrade, and so forth. By now I hoped that the worst problems had been solved (or identified) by the truly early adopters. Because these devices, although blazingly fast compared to spinning platter hard drives, are very expensive, I stuck to a 40GB 'value' model by Intel (the writes are much slower than the reads, although still faster than a hard drive). I had to create a bootable CD from an image downloaded from the Intel website, in order to upgrade the device's firmware. Fortunately, this went without a hitch. Then I booted Ubuntu from a memory stick, and manually partitioned the SSD, not leaving that to the automated install. It gets very technical, but it's a good idea to align the partition with the SSD erase-size boundaries, and where possible, make file systems in those partitions with tweaks that also are driven by the erase block size. I hope that the next time I build a computer the SSD quirks will either be fixed, or compensated for by the operating system.

Then the Ubuntu install began. Here is the second of my two "leaps" -- I was installing 64-bit Ubuntu. Microprocessors began to have 32-bit capability in the mid-1980s, and 32-bit addresses meant that they, and programs that ran on them, could theoretically recognize up to 4 gigabytes of RAM. For the last several years processors have had 64-bit capability, although consumer machines typically continued to run with 32-bit operating systems and programs. However, with memory becoming cheaper and cheaper, and programs and data sets becoming larger and larger, 4 gigabytes of RAM could be a limitation. Also, for some tasks the 64-bit versions of the same program can be faster than the 32-bit. I decided to take the plunge and install the 64-bit version of Ubuntu with 4 GB of RAM in juno. For technical reasons that are historical -- PCs just grew that way from their origins in the 1970s -- a 32-bit operating sytem would actually be able to use no more than about 80% of that 4 GB.

The install went smoothly. (One does always need to tweak and individualize things.) I had been most apprehensive about Adobe Flash, because Adobe Flash for 64-bit Linux was available only as an 'alpha' to be downloaded from Adobe's web site. However, so far this has worked flawlessly, beyond my expectations. The other 64-bit issue was that there is no 64-bit version of Google Earth for Linux, at least not yet. Some have gotten the 32-bit version to run on a 64-bit system with some extensive workarounds, but for now I'm content to wait for a real 64-bit version.

At this point I noticed some oddities. The CPU temperature was 42°C, which I thought quite high for idle. Then I discovered that it was always 42°C, regardless of load or CPU speed -- the sensors were stuck. I gather this is a not-common but not-rare fault in some of the Intel processors of this generation. At least I was getting good temperature data from the combined controller and integrated graphics chip (nVidia MCP79), and from the 500 GB hard drive, so if things were getting hot I would have some warning.

The next oddity was that the BIOS showed my 1150rpm fans running thousands of RPMs faster than that:
Another sensor issue, fan quirk, or BIOS flaw, no doubt. It doesn't reduce the functionality of the system. I usually adjust the fan speeds several times at the beginning, to reach a balance between low-enough noise and good-enough cooling, and then leave them alone.

Through all this work the blue LEDs for the power button and the disk-activity indicator were bugging me. They were way too bright! So I put a little electrical tape over the disk activity light, blocking most of it, and put a disk of black construction paper in the center of the power button.
Here are a couple of images of at juno at work (taken with flash).

I should point out the small keyboard. It's a "Happy Hacking" keyboard for people, such as me, who don't use the numeric keypad, or have a small desk space, or prefer the traditional UNIX key locations for ESC, CONTROL, and the insidious CAPS LOCK.

Regarding the "faster" goal, I don't have any handy Linux benchmarks. Of course, with the SSD, booting now takes only 31 (plus or minus) seconds from power-on. Of that, 19 seconds are the motherboard waking up devices and taking inventory, and only 12 seconds to boot Linux and put up the login screen. Applications start a lot faster too. Let's just compare the specs. The prior computer, tbroma, had a CPU running at 2.13 GHz with a 667 MHz FSB (memory interface) and DDR2-667 memory. Juno runs at 2.93 GHz with a 1066 MHz FSB and DDR2-800 memory. It's gotta be faster!

What about the final goal, "cooler"? Well, tbroma would draw 42 watts when started up and logged in but not doing anything in particular, a state referred to as "idle". juno draws only 30 watts, measured by the same kill-a-watt meter. When running a CPU stress test program (from the Mersenne Prime search), tbroma, in the days when I could undervolt it, drew 77 watts. In the last year, when undervolting through Ubuntu finally became just too difficult, tbroma reverted to drawing 90 watts. juno sips 63 watts under that test.

And here's one of the best surprises. In tbroma's early days, I tried to get 'sleep' to work. Joan's iMac does 'sleep' very well; just hit a key or move the mouse, and in two or three seconds your desktop is back. I could never get tbroma to wake up properly from a sleep; it always thought it had been rebooted without a proper shutdown. Perhaps it was the motherboard, perhaps it was the operating system of three years ago, but I gave up on it. Guess what? Sleep on juno works, although it is not as slick as the iMac. I must press the power button, and eleven seconds later, after a few messages flash by on the screen, too fast to read, my desktop is back. (Complete with 'network disconnected' and 'network reconnected' notifications.) While asleep, juno draws only 5 watts! Heck, the power drain for just being plugged in while off is 4 watts. I've got juno set to automatically go to sleep after 30 minutes of no activity.

Can I repeat "faster, smaller, cooler" in two or three years? I think so. Smaller will be the biggest challenge, but it can be done, as with this system, which is about the same width and depth but shorter than juno. As infrequently as I use the CD/DVD drive, I could employ an external optical drive on those occasions where I needed one, which would free up space and reduce the cable count. As components get smaller and more capable, where's the limit?!